Tips, tools and tricks for inspecting properly cleaned endoscopes
Healthcare Purchasing News asked a variety of sterile processing experts to share some useful tips on how to inspect cleaned endoscopic devices before those devices are placed inside the high-level disinfection unit or sterilizer. Here’s what they shared.
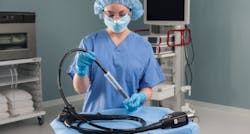
According to national AAMI standards (ST91), and professional guidelines, such as those from SGNA and AORN, endoscopes should be inspected after manual cleaning prior to disinfection and sterilization. Inspection is a two-part endeavor consisting of a visual inspection and a cleaning verification test. SGNA states that this is the safety stop or time out to ensure that the endoscope has been adequately cleaned and is in good condition in order to move onto the terminal step of either high-level disinfection or sterilization. At minimum, endoscopes must be inspected with the unaided eye each time they are processed. Beyond that, standards and guidelines call for the scope to be inspected under lighted magnification to aid in the detection of debris or damage to the endoscope that would necessitate it either being re-cleaned or taken out of service for repair.
In addition, AAMI ST91 and AORN recommend – but don’t require – use of a borescope to inspect the internal channel for debris, retained items, and damage that could compromise effective reprocessing. Additionally, a cleaning verification test, such as one for protein, hemoglobin or ATP should be used and is called for in the standards and professional guidelines. A cleaning verification test monitors the internal channel of the scope for retained residues. In order to get a true picture of the condition of the endoscope after manual cleaning it is necessary to employ all of these techniques: Visual inspection with lighted magnification and the cleaning verification test. Periodic inspection with a borescope is also an integral part of the process. This is the only way to get a snapshot of the endoscope to assess it for retained debris and damage.
Mary Ann Drosnock, FAPIC, CIC, CFER, RM (NRCM), Senior Manager of Clinical Education, Healthmark Industries
- Manual external condition check: After completing manual cleaning all flexible endoscopes should undergo a required external condition check. While you are looking for damage and general condition of the endoscope as a whole, the distal tip should be closely examined under illuminated magnification. Any signs of residual debris or build-up should cause the manual cleaning actions to be repeated. Damage to the distal end, lenses, or working portion of the endoscope is not always apparent without enhanced visualization. If damage is detected it can be safely identified and removed.
- Manual internal condition check: Use of a borescope to visualize the working channel is strongly recommended. Routine internal visualization looking for damage or debris can greatly decrease risk to the patient and the degree of damage to the endoscope.
- External and internal surveillance testing: While surveillance tests come in many different forms, established organics or ATP testing of flexible endoscopes gives some verification to cleaning processes that cannot be achieved with the human eye even under magnification. Tests resulting in failure may throw up a valuable red flag indicating a lack of proficiency or procedure, issue with contaminants adhering on or within the endoscope, an unrealized equipment malfunction, or an unexpected environmental variable such as poor water quality.
- Image check for non-video fiberscopes: Always visually check the image quality prior to sterilization. Better to fail in your hands than during use on a patient.
Melissa Kubach, Educator/Quality Manager, Unitas Medical Services Inc.,
a Mobile Instrument Service & Repair Company
Appropriate lighting in all SPD work areas, including decontamination, prep-and-pack, sterilization and storage functions, makes a huge difference in visualizing soils, damage, residues, and non-intact packaging or containers.
Dan Gusanders, Pure Processing
A sterilizable borescope can assist in identifying damages to endoscopes that can be exacerbated by HLD or sterilization. Even more important, a borescope combined with ATP testing can assist in the elimination of inadequate cleaning and the development of biofilm, which is a substantial risk factor for inadequate processing and infection risk to patients.
Pika Lynch, R.N., Director, Clinical Services, TSO3 Corp.
“Endoscopes should be mechanically and optically tested prior to disinfection or sterilization. After successful leak testing and cleaning, at a minimum, angulation should be inspected along with a visual inspection of the bending rubber, the bending rubber glue joints, light guide and objective lens adhesive and optical glass. The insertion tube, light guide tube, control body and light guide connector should also be visually inspected for scratches, cuts and minor damage. Internally, the instrument channel should be scoped for debris or damage. We owe it to the next patient to ensure a safe and effective endoscope.”
Minerva Lorán, President, Clinical Choice LLC
Be sure to perform the following steps:
- ATP Testing – Adenosine Triphosphate – Surface and lumen testing
- Visual inspection of external surfaces
- Magnification inspection external surfaces
- Direct digital camera Lumen inspection scope
- Protein Testing
- Leakage testing
Ron Banach, Director of Clinical Education and Training,
The Ruhof Corp.
Use a borescope
Rick Schultz, President, RMPS Publishing LLC, and former CEO, Spectrum Surgical Instruments, part of STERIS IMS
SCOPES:
Single-use endoscopes: Pop fly or home run in cleaning, sterilization?
Reusable endoscopes: Tried and true for cleaning
If you’re being scoped, shouldn’t that scope be tested first?

Rick Dana Barlow | Senior Editor
Rick Dana Barlow is Senior Editor for Healthcare Purchasing News, an Endeavor Business Media publication. He can be reached at [email protected].
